Introduction
Recently, I decided to revamp my home network and explore setting up a Windows Domain. The main driver
behind this was my interest in configuring OpenVPN on my pfSense router using LDAP authentication.
However, I quickly discovered that most existing guides for integrating pfSense with LDAP are outdated,
leading to a significant amount of trial and error to get the setup and configuration just right.
Based on my experience, this blog post aims to guide you through setting up LDAP on pfSense and enabling
Active Directory authentication. For this, we will need to deploy the following:
- 1 VM running Windows Server 2022, with Active Directory Domain Services role.
- 1 VM running Windows Server 2022, with Active Directory Certificate Services role.
- 1 pfSense appliance (version 24.03).
- 1 (mobile) device, such as a laptop with the OpenVPN client installed.
Note: It is recommended to run, at least, two domain controllers and ensure replication is enabled. Although I fully support this notion, for this tutorial I will not go to the length of setting up a second AD DC.
Configuring the Active Directory Domain Controller
I found that configuring the Active Directory Domain Controller was the 'easy' step in the process. We will complete three main steps to enable LDAP:
- Deploy the Active Directory Domain Services (feel free to skip this step if you are familiar with deploying ADDS);
- Create a specific organizational unit with 1 user;
- Setup a connection to the LDAP server;
- Login with the newly created user to confirm successful authentication;
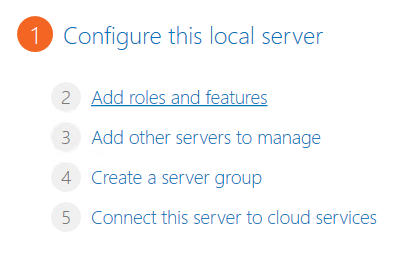
In the server manager, click "Add roles and features"...
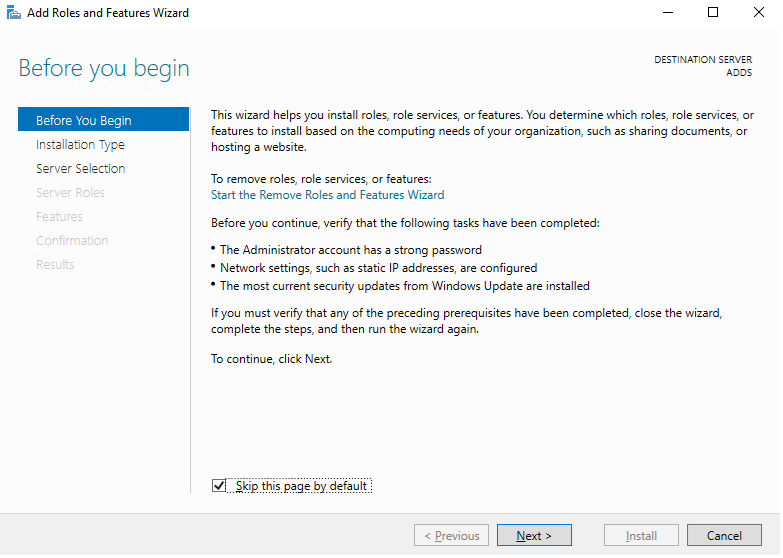
On the first page in the wizard, click next...

Ensure you select "Role-based or feature-based installation" and click next...
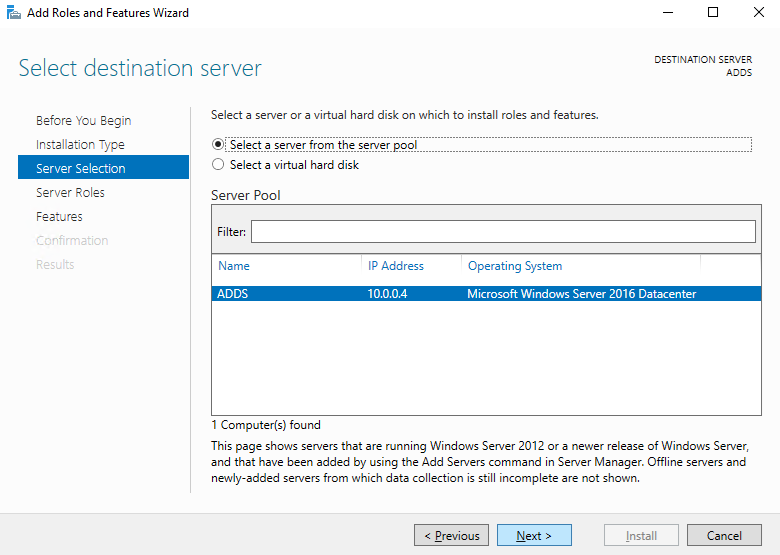
In the server selection tab, select the current server and click next...
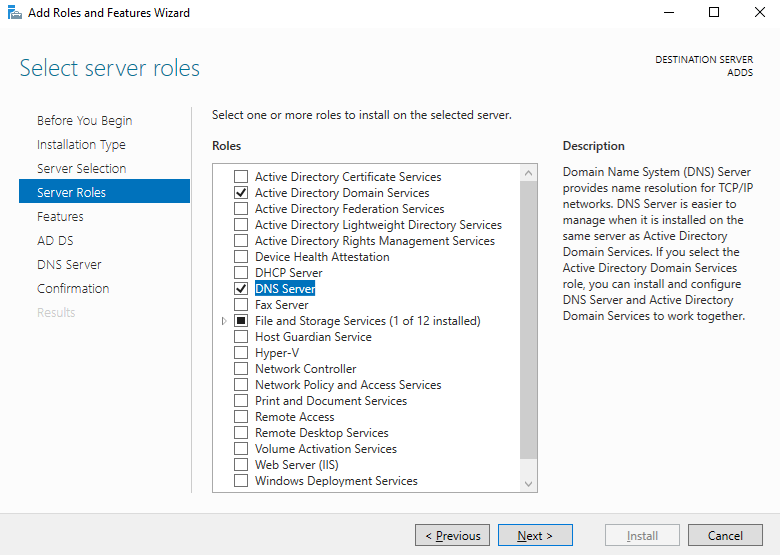
On the server roles tab, ensure you select both the Active Directory Domain Services and DNS Server roles...
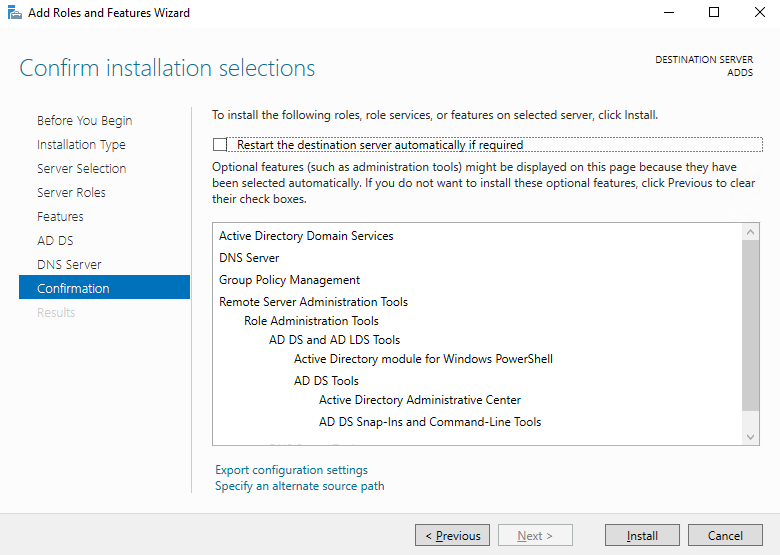
On the confirmation tab ensure the roles are displayed. You may opt to select the "Restart the destination server automatically if required" option, but it should not be necessary to perform a server restart.
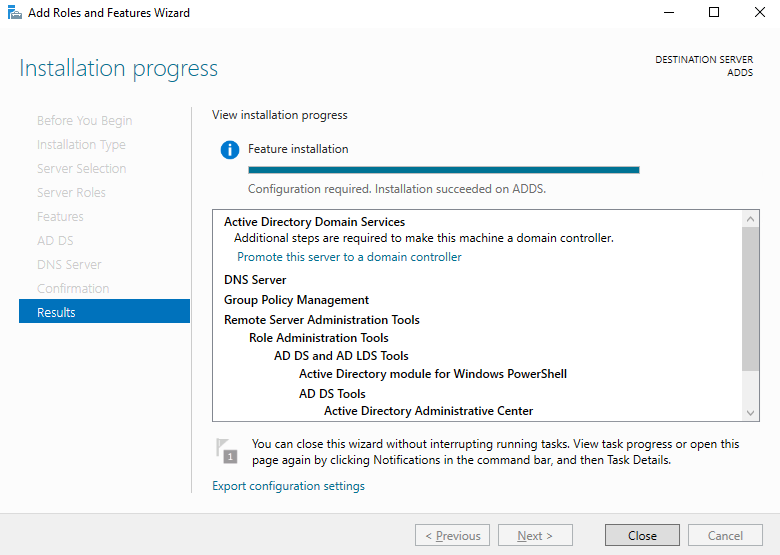
The specified roles will now be installed, this may take a couple of minutes. Once this has been successfully completed, you will see the option appear to "Promote this server to a domain controller". Select this option.
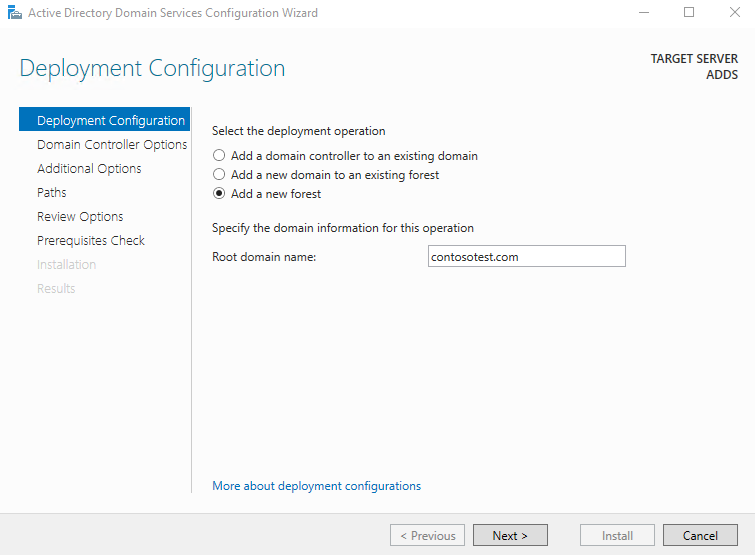
Since this is a new setup, we will begin by adding a new forest. Ensure you give your forest an appropriate name, like "contosotest.com"

In the domain controller options pane, add a secure Directory Service Restore Mode password and click next...
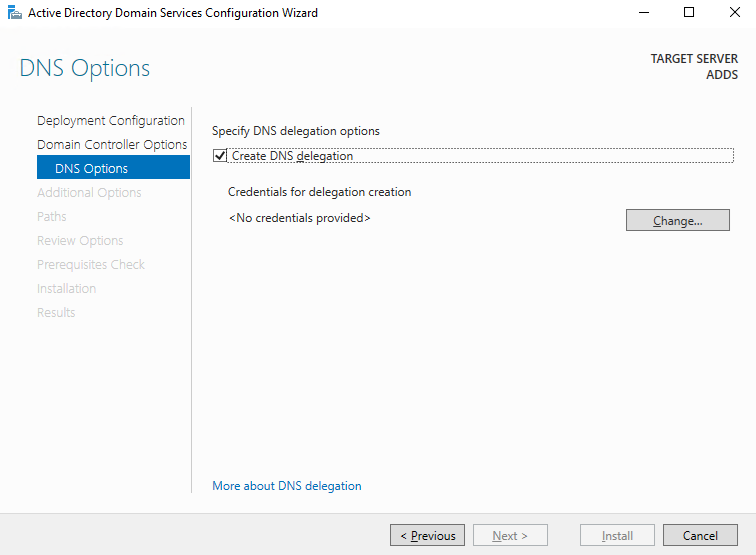
Select the button to create the DNS delegation and add the credentials of the Administrative user of the server before clicking next...
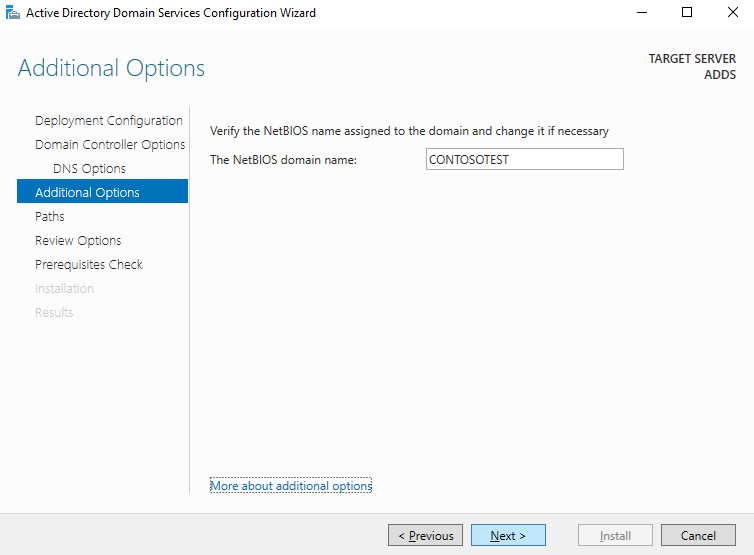
The wizard should automatically fill the NetBIOS name, we will leave this to the default value, click next...
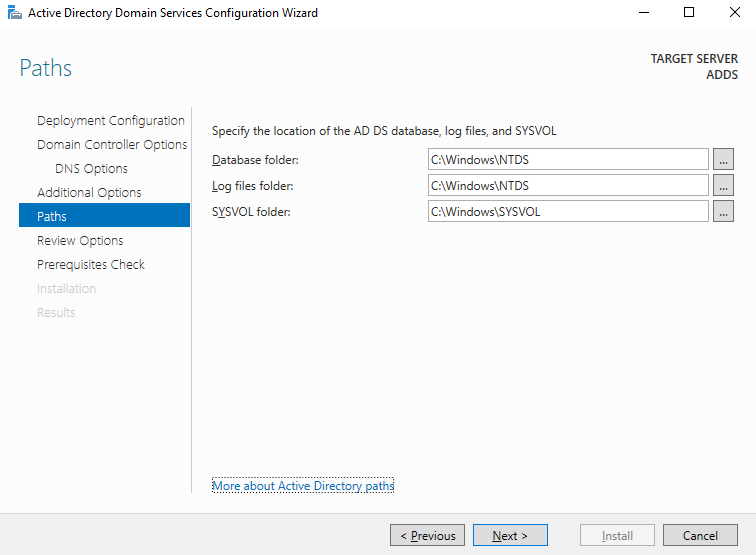
The wizard should automatically fill the paths, we will leave these to the default value, click next...
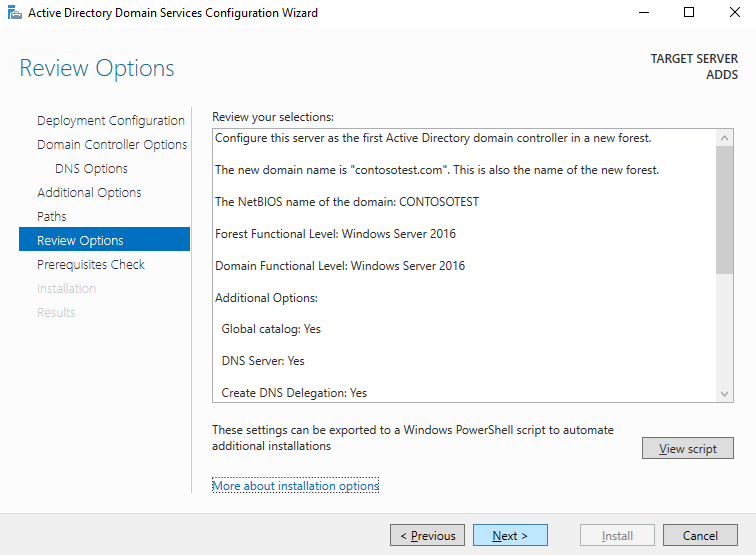
Review the chosen options and click next...
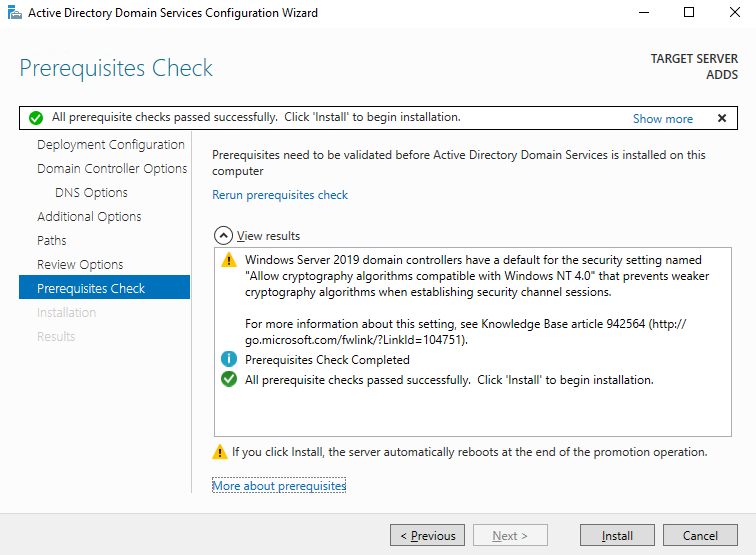
The wizard will perform a prerequisites check which should pass successfully on a default server. You can now select install, which will deploy the Active Directory Domain Services and DNS Server configuration to the server. This may take a while and afterwards a reboot is likely required. Once completed, the server is now the primary Domain Controller and we can continue by creating an OU and dedicated VPN user.
Creating an OU and user
We will create a dedicated VPNUsers Organizational Unit by opening the Active Directory Users
and Computers application on the Domain Controller.
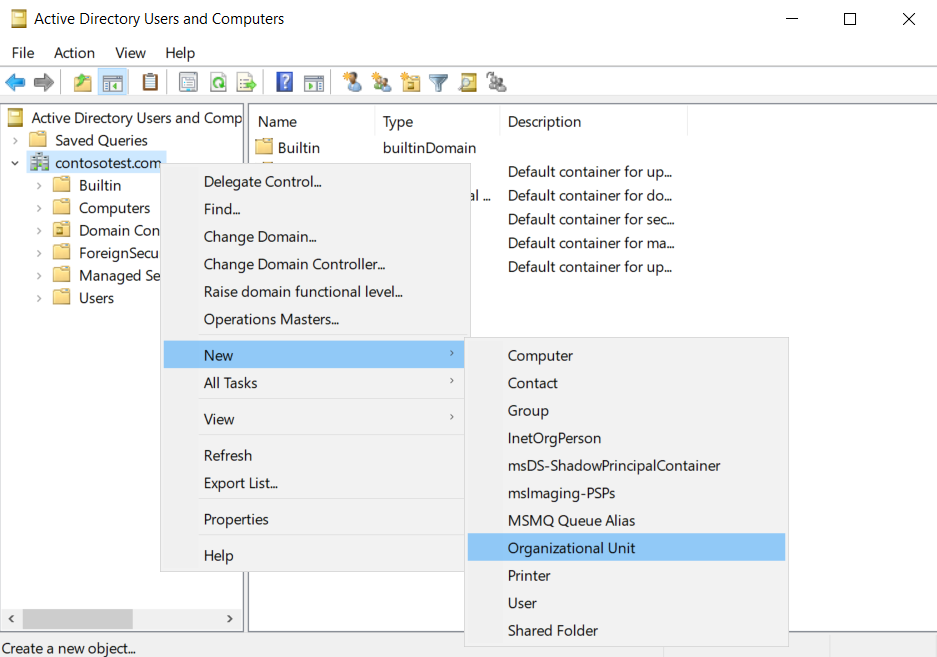
In this application, right click our domain (contosotest.com) and select
New
-> Organizational Unit
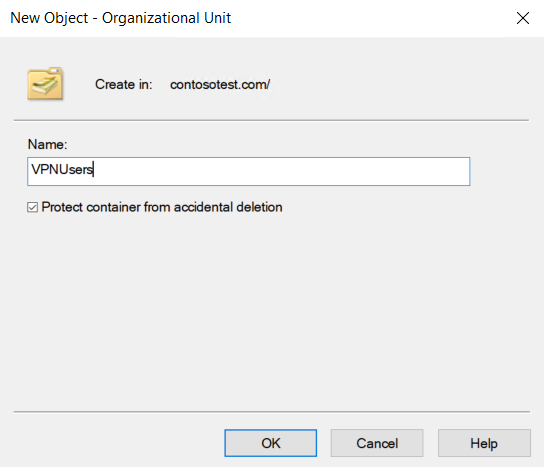
Name the OU something distinctive like VPNUsers.
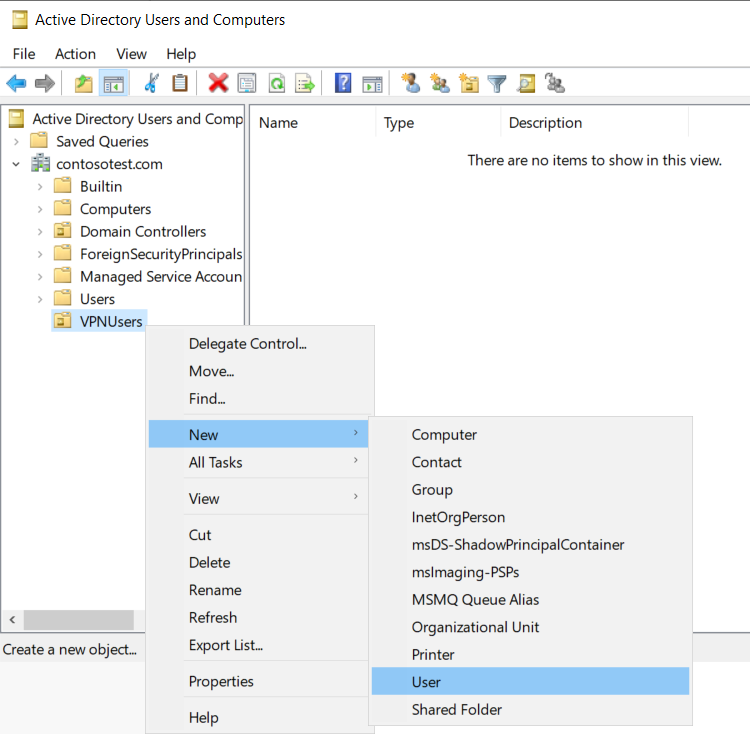
In this Organizational Unit, add a new user
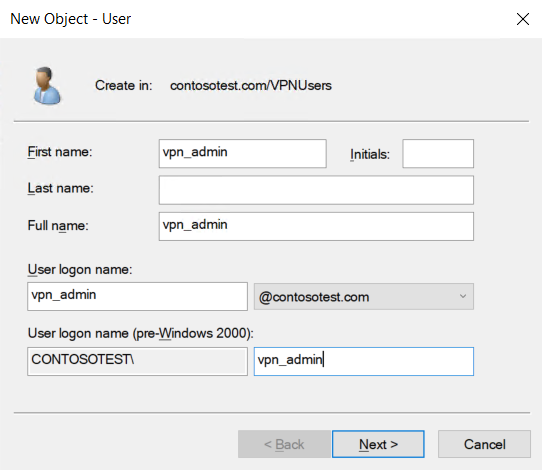
Name the user vpn_admin and set a password
Setting up a connection to the LDAP server
Using the Windows button, search for ldp.exe and open the application. In the menu, select
Connection -> Connect....
Fill in the server (contosotest.com) and port (389) and leave both the "Connectionless" and
"SSL" checkboxes unchecked. After clicking on OK, it should result in a long list of keys and values. At
the top of this response, it should state "Established connection to contosotest.com".
In case any other message is displayed, there is likely a fault in the default LDAP setup. Please
consult online sources as to what prevents a successful connection.
Logging in with the new user on the LDAP server
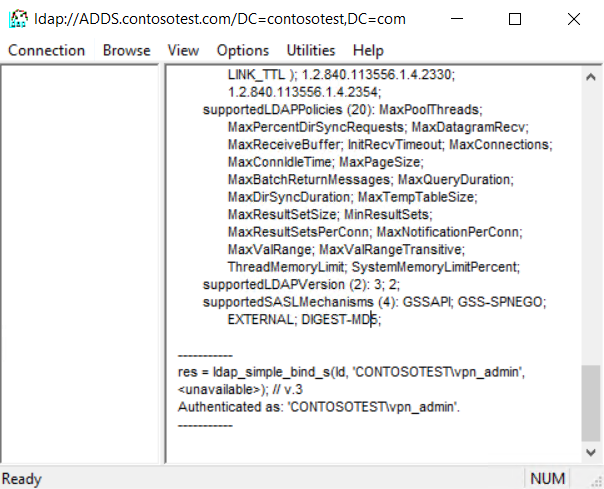
Now, in the ldp.exe application go to Connection" -> Bind.... In the menu,
select the option "Simple bind". Supply the plain username (vpn_admin) and corresponding
password and click "OK". You should see a message stating "Authenticated as
CONTOSOTEST\vpn_admin.
In case any other message is displayed, there is likely a fault in the LDAP setup. Review your
username and password and ensure the user was properly configured.
If all of this went as expected, LDAP is properly configured and we are ready to continue to the next step.
Configuring the pfSense appliance - Setting up LDAP over Standard TCP
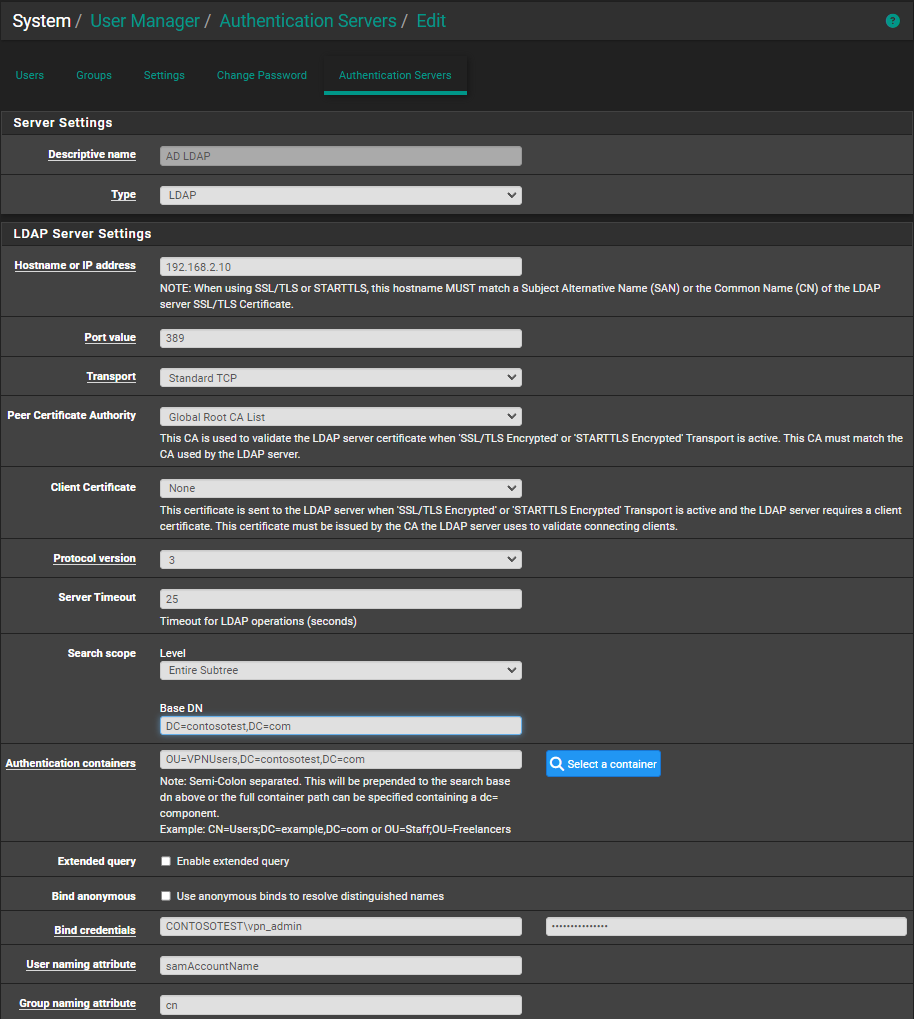
To enable LDAP authentication on the pfSense we first have to setup an Authentication Server with the
applicable settings to allow the connection between the pfSense appliance and the DC. On the pfSense, go
to System -> User Manager -> Authentication Servers ->
Add. I have used the following values for the following fields:
- Descriptive name -> AD LDAP -> Can be anything you like
- Type -> LDAP -> Should be self explanatory
- Hostname or IP address -> dc0.contosotest.com -> The hostname of the Domain Controller, this can also be the IP address. Check the PC name of the Domain Controller if you don't know its hostname
- Port value -> 389 -> Default TCP LDAP port
- Transport -> Standard TCP -> Default protocol for LDAP on port 389
- Peer Certificate Authority -> Can be left empty / to its default value since this is only applicable if we use STARTTLS / TLS Encrypted LDAP
- Client Certificate -> None -> Can be left empty since this is only applicable if we use STARTTLS / TLS Encrypted LDAP
- Protocol Version -> 3 -> LDAP protocol version
- Server Timeout -> 25 -> Default timeout should be fine
- Search Scope
- Level -> Entire Subtree -> Allows us to find all authentication containers
- Base DN -> DC=contosotest,DC=com -> Set to the base domain name of our domain
- Authentication containers -> Skipping over this on purpose for now
- Extended query -> Unchecked -> We do not currently need this feature, it allows us to add certain requirements to the user(s) within a specific authentication container
- Bind anonymous -> Unchecked -> We do not want to use anonymous binds
- Bind Credentials
- Username: CONTOSOTEST\admin
- Password: password -> the password we previously configured for this user
- Initial Template -> Microsoft AD
- User naming attribute -> sAMAccountName -> Windows specific value
- Group naming attribute -> cn -> Windows specific value
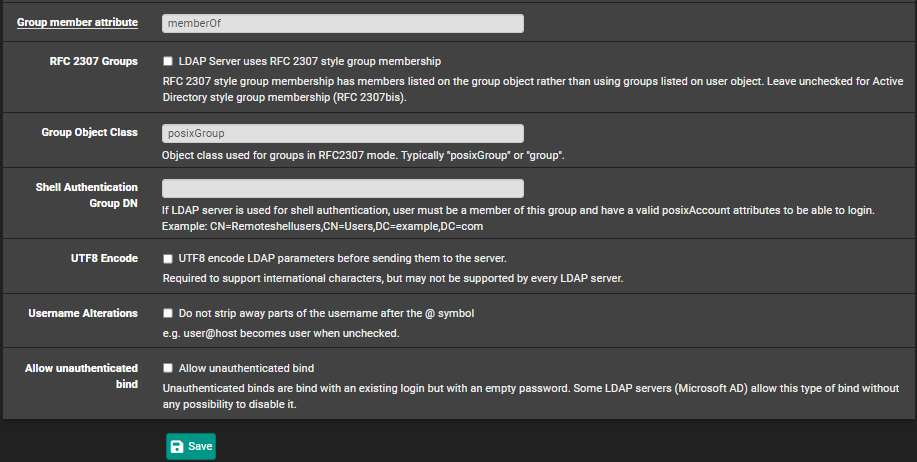
- Group member attribute -> memberOf -> Windows specific value
- RFC 2307 Groups -> Unchecked -> Not a requirement for Windows LDAP
- Group Object Class -> posixGroup -> Default object class for RFC2307
- UTF8 Encode -> Unchecked -> Not a requirement for our setup
- Username Alternations -> Unchecked -> Not a requirement for our setup
- Allow unauthenticated bind -> Unchecked -> Could be needed when we use a (group) Managed Service Account ((g)MSA) but in our case this is not a requirement
Now, we can refer back to the earlier skipped Authentication containers. Here we will
pre-fill the top level container, which is equal to the top-level domain name
DC=contosotest,DC=com. Note that using the button on the right-hand side also allows us to
select a container.
If you configured everything correctly and pre-filled the field, clicking the button should result in a
pop-up window, allowing us to select the specific authentication container we would like to use. In case
nothing happens, scroll to the bottom, you should be presented with a red string stating something like:
Could not connect to the LDAP server. Please check the LDAP configuration. This means one
of the values above is configured incorrectly, so you would need to go back and review the settings. In
our case everything went well and we can select the appropriate container:
OU=VPNUsers,DC=contosotest,DC=com. We could also have prefilled this option, but using the
button, we verify that the connection to the LDAP server on the Domain Controller is working.
Now, go ahead and save this Authentication Server configuration. We want to be absolutely certain that
this configuration works, for that we will go to the "Settings" tab in the User Manager. Here, change
the authentication server from "Local Database" to the authentication server name we just created and
click on "Save & Test". If the LDAP configuration settings are correctly configured we should be
presented with an overview of the test results stating all 3 tests succeeded and one or more
organizational units were found.
Configuring the Active Directory Certificate Services
Since OpenVPN will be working with certificates, we want to ensure that we have a Certificate Authority under our control that can deploy domain wide certificates. For this, we will be using a clean Windows Server 2022 installation on which we will deploy the Certificate Services roles & features. When the Certificate Services have been deployed, the Certification Authority tool allows us to export the CA's certificate. We will need this certificate to add the Certificate Authority to pfSense. Furthermore, using the templates, we need to create a server certificate for the pfSense.
In the server manager, click "Add roles and features"...
On the first page in the wizard, click next...
Ensure you select "Role-based or feature-based installation" and click next...
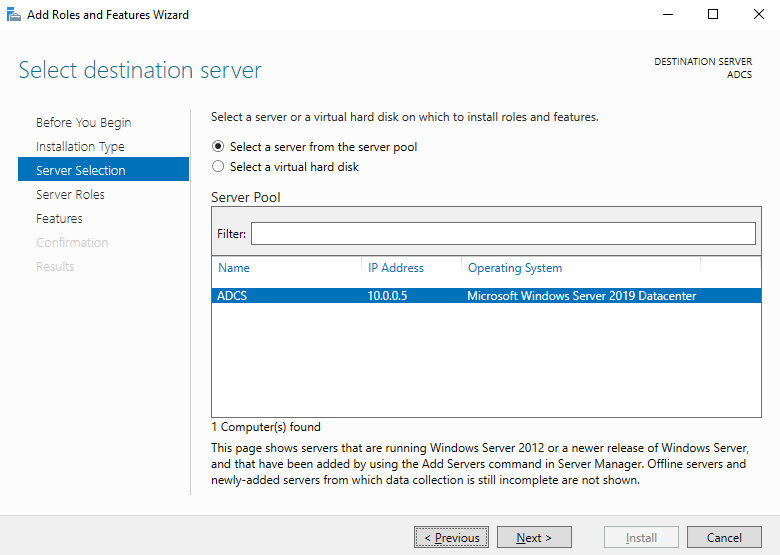
In the server selection tab, select the current server and click next...
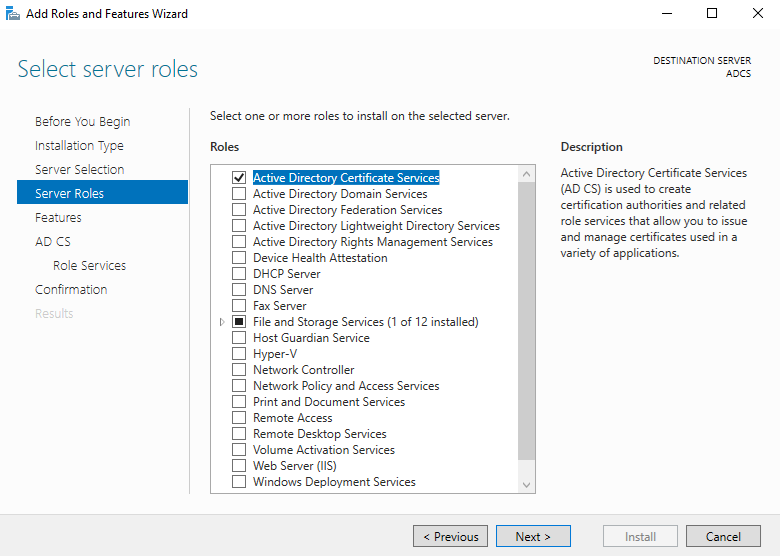
On the server roles tab, ensure you select the Active Directory Certificate Services role and click next...
The goal of this server is to issue and manage certificates, as such we chose the Certificate Authority role. Click next...
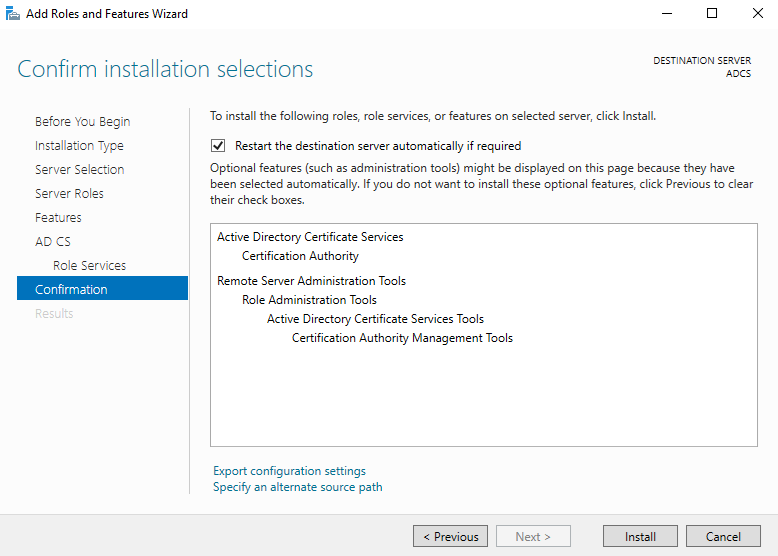
On the confirmation tab ensure the roles are displayed. You may opt to select the "Restart the destination server automatically if required" option, but it should not be necessary to perform a server restart.
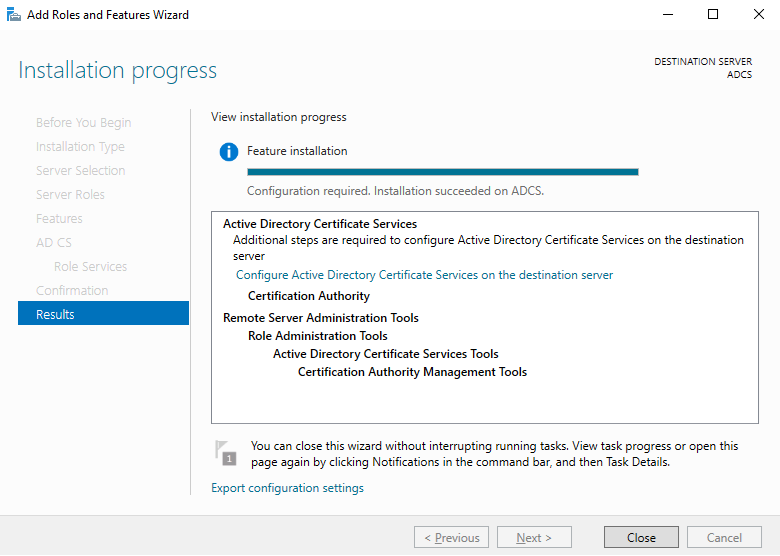
The specified roles will now be installed, this may take a couple of minutes. Once this has been successfully completed, you will see the option appear to "Configure Active Directory Certificate Services on the destination server". Select this option before continuing.
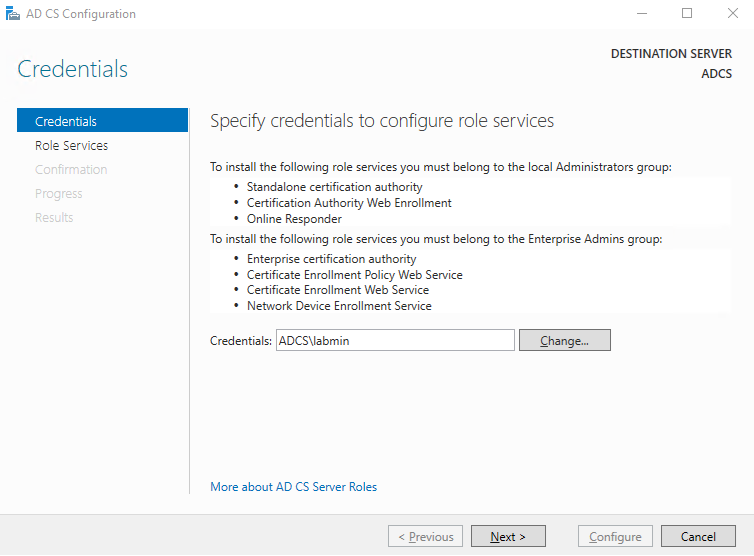
Specify the credentials to configure role services, in this instance we will use the local Administrator credentials.
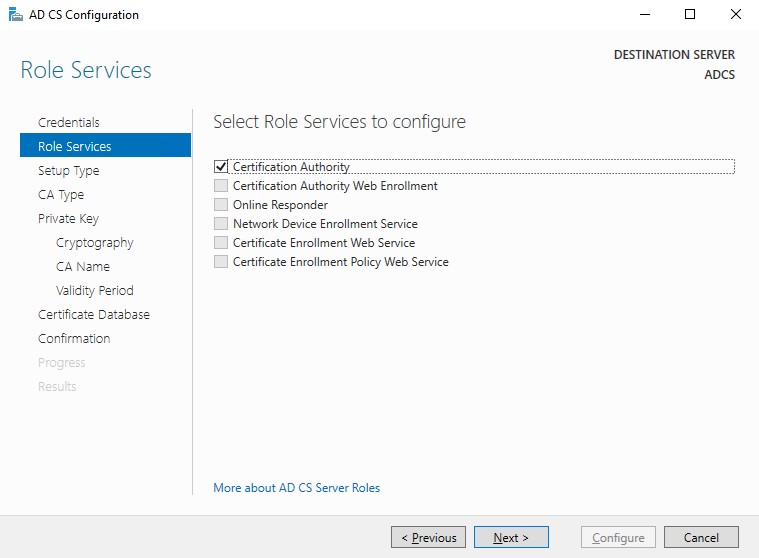
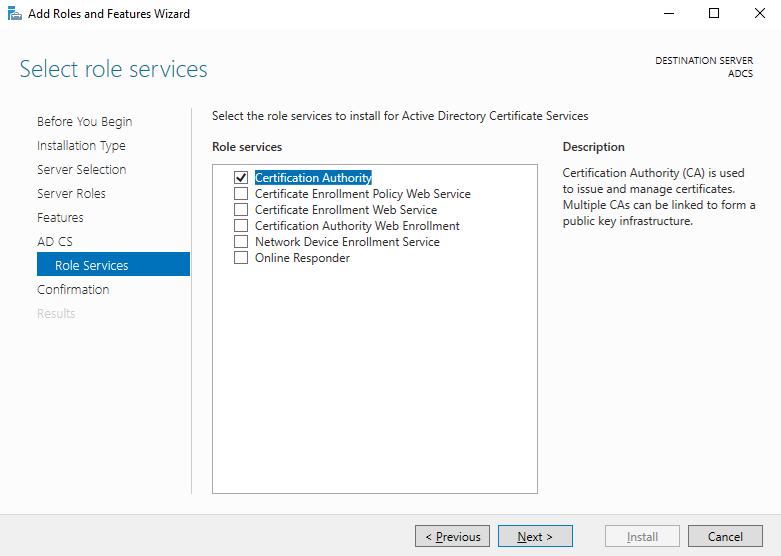
Since we only installed the Certificate Authority role, it is the only option we can select before clicking next...
Configuring the pfSense appliance - Deploying OpenVPN
pfSense has the OpenVPN package preinstalled. If this isn't the case for your setup, please go ahead and download the OpenVPN package using the Package Manager. Next, we go to VPN -> OpenVPN and using the Wizards tab we will deploy a new OpenVPN server.

In the first step, set the type of server to "LDAP", click next...
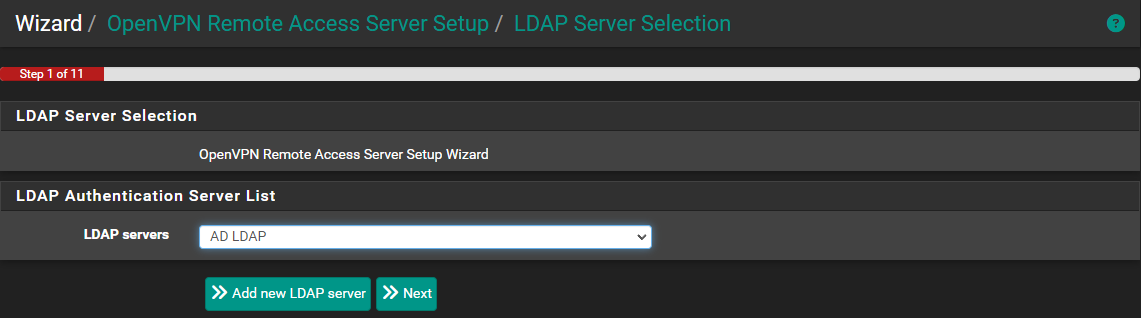
On the next step, select the previously deployed authentication server, in our case `AD LDAP` and click next...
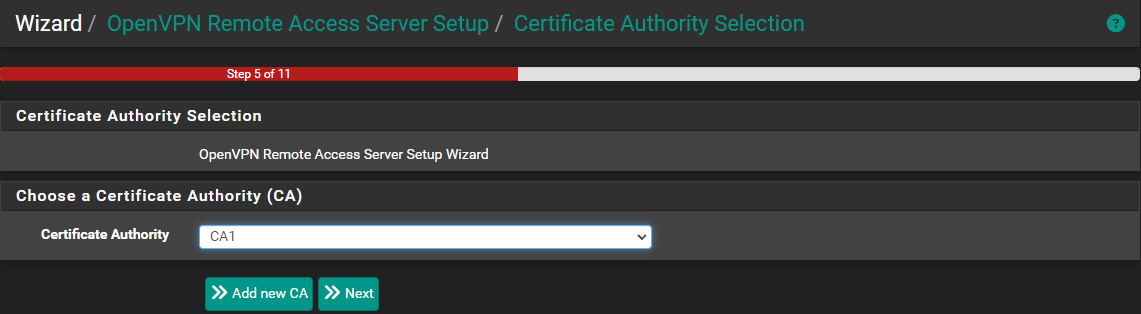
Continuing, in the next step we select the Certificate Authority we previously deployed to pfSense.
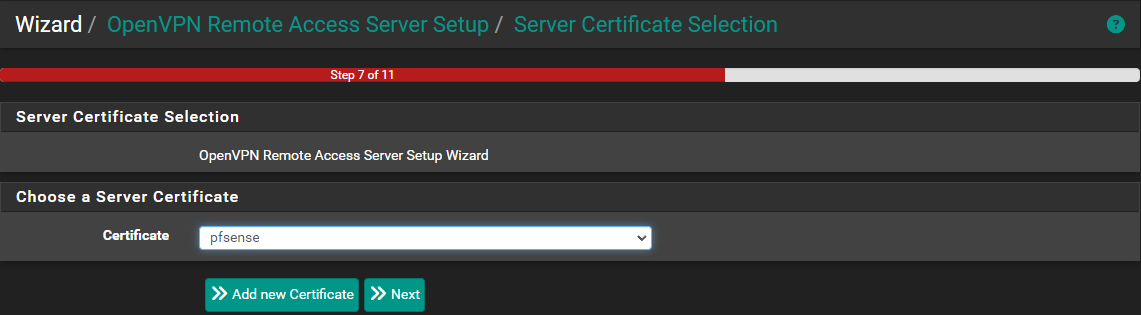
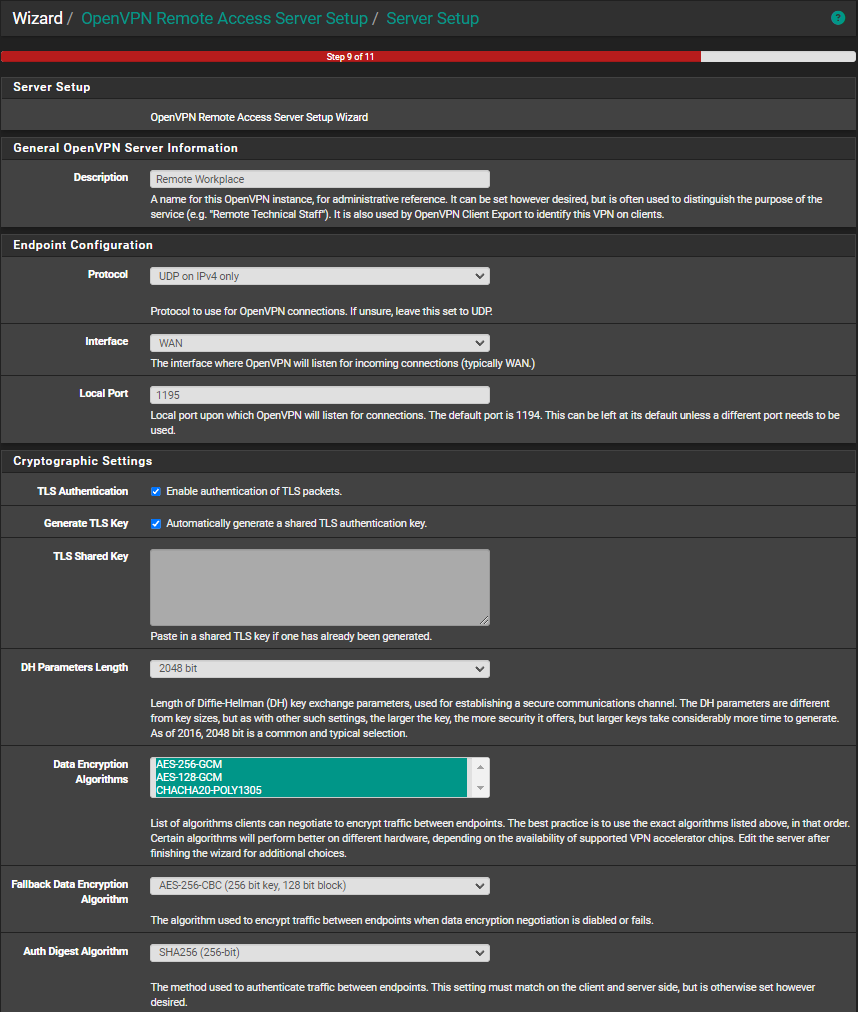
Moving on, in the following step, we select the previously imported server certificate. Click next... Now, we reach step 9 of the setup. Here, we use the following options with corresponding values:
- Description -> Remote Workplace -> can be anything you like
- Protocol -> UDP on IPv4 only -> we will use the simplest setting here.
- Interface -> WAN -> we want to be able to connect to the OpenVPN server from outside of our network.
- Local Port -> 1194 -> this can be any value you like.
- TLS Authentication -> enabled -> we will leave this in place.
- Generate TLS Key -> enabled -> will automatically take place.
- DH Parameters Length -> 2048 bit -> choose at least 2048-bit or higher for security reasons.
- Data Encryption Algorithms -> select all -> these algorithms allow for a variety of computers whilst keeping security high.
- Fallback Data Encryption Algorithm -> AES-256-CBC (256 bit key, 128 bit block) -> select this or any other secure value.
- Auth Digest Algorithm -> SHA256 (256-bit) -> select this or any other secure value.
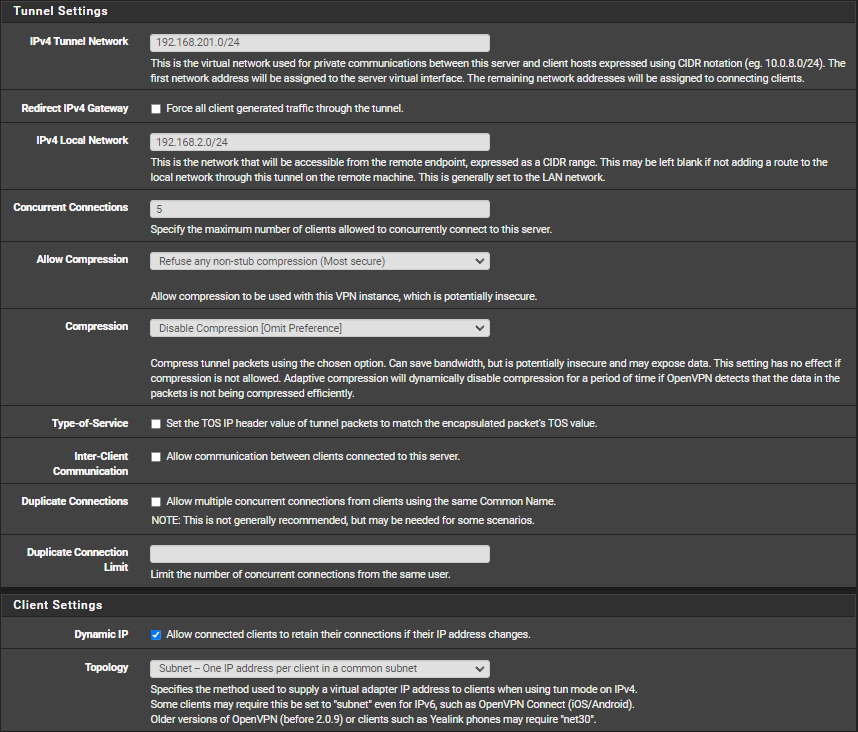
- Tunnel Network -> 192.168.201.0/24 -> the network range of IP addresses that clients connecting over OpenVPN should receive.
- IPv4 Local Network -> 192.168.2.0/24 -> the currently connected local network range on the inside of your network.
- Concurrent Connections -> 5 -> this value will depend on the amount of hosts that will connect over VPN at the same time.
- Allow Compression -> Refuse any non-stub compression (Most secure) -> Select the most secure option.
- Compression -> Disable Compression [Omit Preference]
- Dynamic IP -> checked -> allow hosts to receive dynamic IPs rather than static IPs
- Topology -> Subnet -> One IP address per client in a common subnet -> most straightforward solution to keep maintenance low.
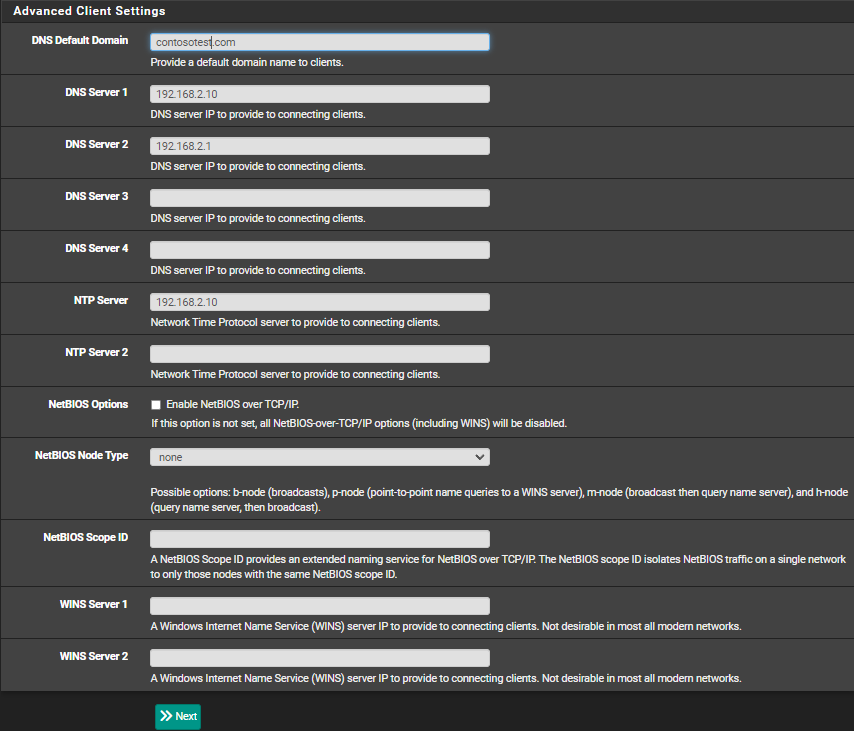
- DNS default domain -> contosotest.com -> Domain name of the Domain -> the default domain that should be used for DNS queries.
- DNS Server 1 -> 192.168.2.10 -> IP address of the Domain Controller which will be used for DNS queries.
- NTP Server -> 192.168.2.10 -> IP address of the Domain Controller which will be used for NTP queries.
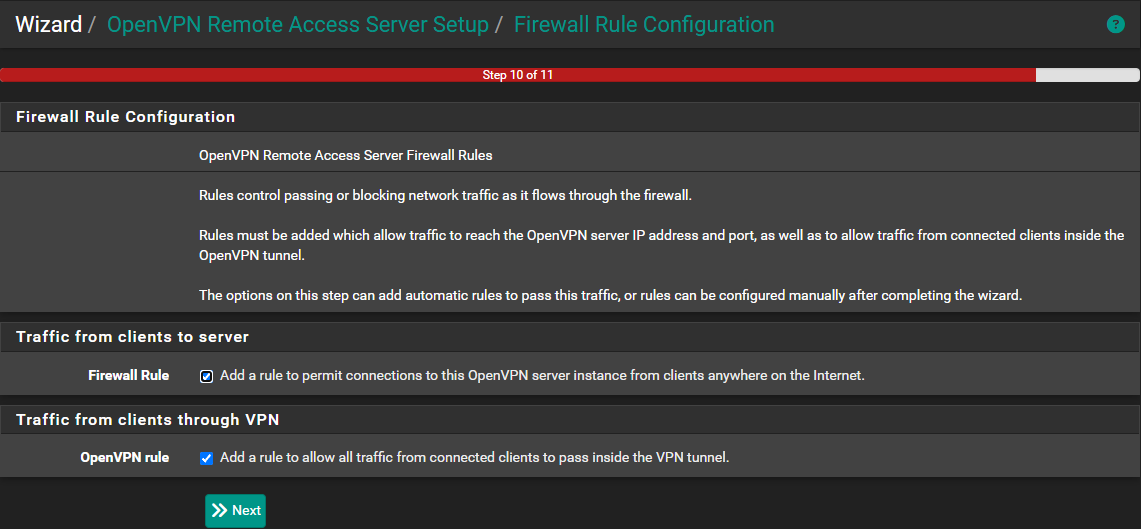
Then, on the last pane enable both options:
- Traffic from clients to server -> Add a rule to permit connections to this OpenVPN server instance from clients anywhere on the internet
- Traffic from clients through VPN -> Add a rule to allow all traffic from connected clients to pass inside the VPN tunnel
Installing OpenVPN client export package and exporting client certificates
To make life easier, we will proceed to download the Client Export tool which enables the easy
direct creation of a OpenVPN Client Config file.
Go to System -> Package Manager and search for
openvpn-client-export. After installing the package go to VPN ->
OpenVPN -> Client Export. In this screen, scroll down to the
OpenVPN Clients pane. Here, the option should be provided to download the
Inline Configuration. Proceed by selecting the Most Clients option and
copy/transfer the file to the laptop or any other device. Ensure that said device is currently
not connected to the WiFi network in which the OpenVPN server is installed.
To properly test this, ensure that your laptop (or whatever test device you use) is not connected to
your home network, instead use a hotspot or other network. Then, import the configuration file into the
OpenVPN client on the device and use the credentials of the "vpn_admin" user previously created to
finish setting up the VPN connection. Now, if all went well, you should be connected to the OpenVPN
server and as such your own network. You can test this, amongst others, by browsing to the internal IP
address of your pfSense device.