Introduction
In this blog post, we will dive into setting up a VLAN connection from a dedicated Proxmox VM
through pfSense to ensure
network separation. For example, when analyzing malware, an internet connection is sometimes
required and this connection
should be as secure and separate from all other traffic on the network as possible, to avoid
conflicts, accidental infections
and other unwanted side effects.
For this demonstration of setting up a VLAN throughout your network to separate the network
traffic coming from a specific VM,
we will use a very basic network layout as depicted below. We have an incoming WAN internet
connection to our pfSense from
the internet. Subsequently, on the LAN side of the pfSense, a managed switch is connected, which
connects directly to the Proxmox
host.

Configuring the Switch
First, we will configure the switch to ensure we have a network port dedicated to VLAN traffic. In this
example, we will be using the Netgear GS308EPP managed switch. Furthermore, the LAN interface of the
pfSense is connected to port number 1 on the switch, and the Proxmox host is connected to port 3 on the
switch.
We will now complete the following steps:
Create a VLAN
The Netgear managed switch by default has one VLAN configured: VLAN 1. This VLAN is the default VLAN that carries all untagged traffic over. This is important to note as, by default, this VLAN is used on all ports.
- Go to
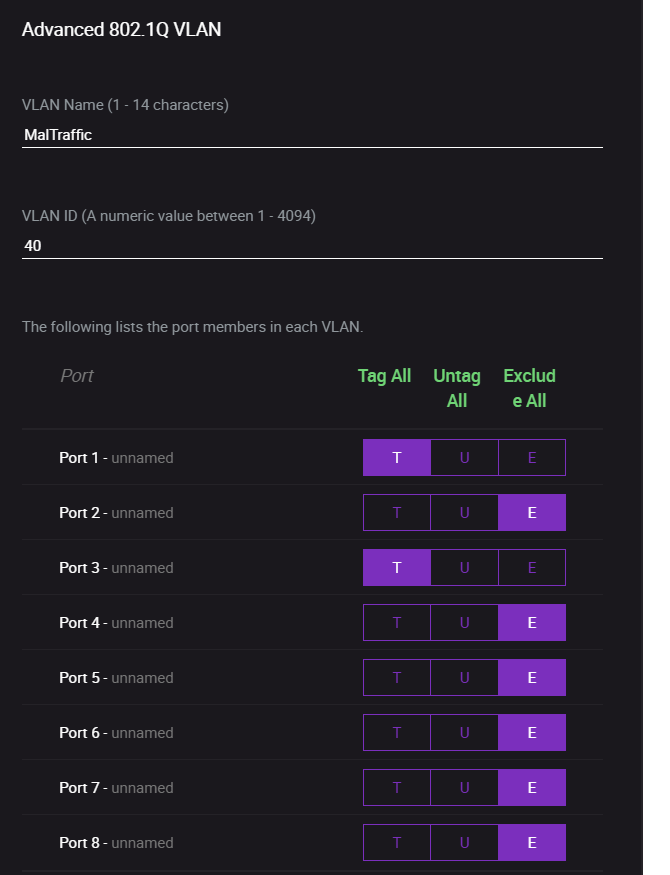
Switching>VLANin the switch's management interface and selectAdvanced 802.1Q VLAN - Click
Add VLANand add a VLAN name and VLAN ID (e.g. 40)
NOTE: for our setup, we want Proxmox to receive both the normal LAN traffic as well as the
tagged VLAN traffic.
Additionally, we will configure the pfSense to differentiate between tagged and untagged traffic. Thus,
we
will need to tag port 1 and port 3 in the VLAN. For other use cases, it may be required to untag a
specific port. This all depends on your specific needs.
- Tag both port 1 and port 3
Because of our current setup, we will not need to configure the PVID table. Since all untagged traffic
by
default will use VLAN ID 1, we have achieved the goal of our use case.
Configuring pfSense
Now that the switch is configured, we can move on to our pfSense. Here we need to complete the following steps:
Creating the VLAN
To create the VLAN, complete the steps below:
- In your pfSense dashboard, go to
InterfacesAssignmentsVLANs. - Click on the
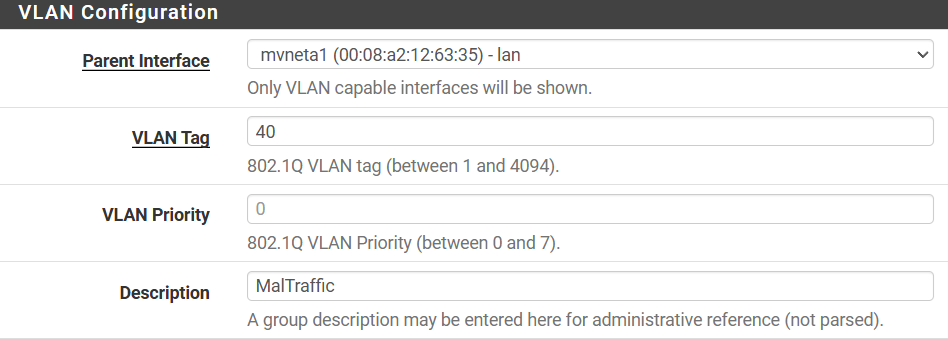
+button to add a new VLAN. - Choose the appropriate parent interface. In our case, the interface connected to the switch, which is the LAN interface.
- Enter the VLAN ID created on the switch (e.g. 40).
- Provide a description as needed.
- Click
Save.
Assign and Enable the Network Interface
In the previous step, we have created a new network interface on LAN. We now need to assign and enable this interface.
- Go to
Interfaces>Assignments. - Add a new interface assignment for the VLAN you created and click
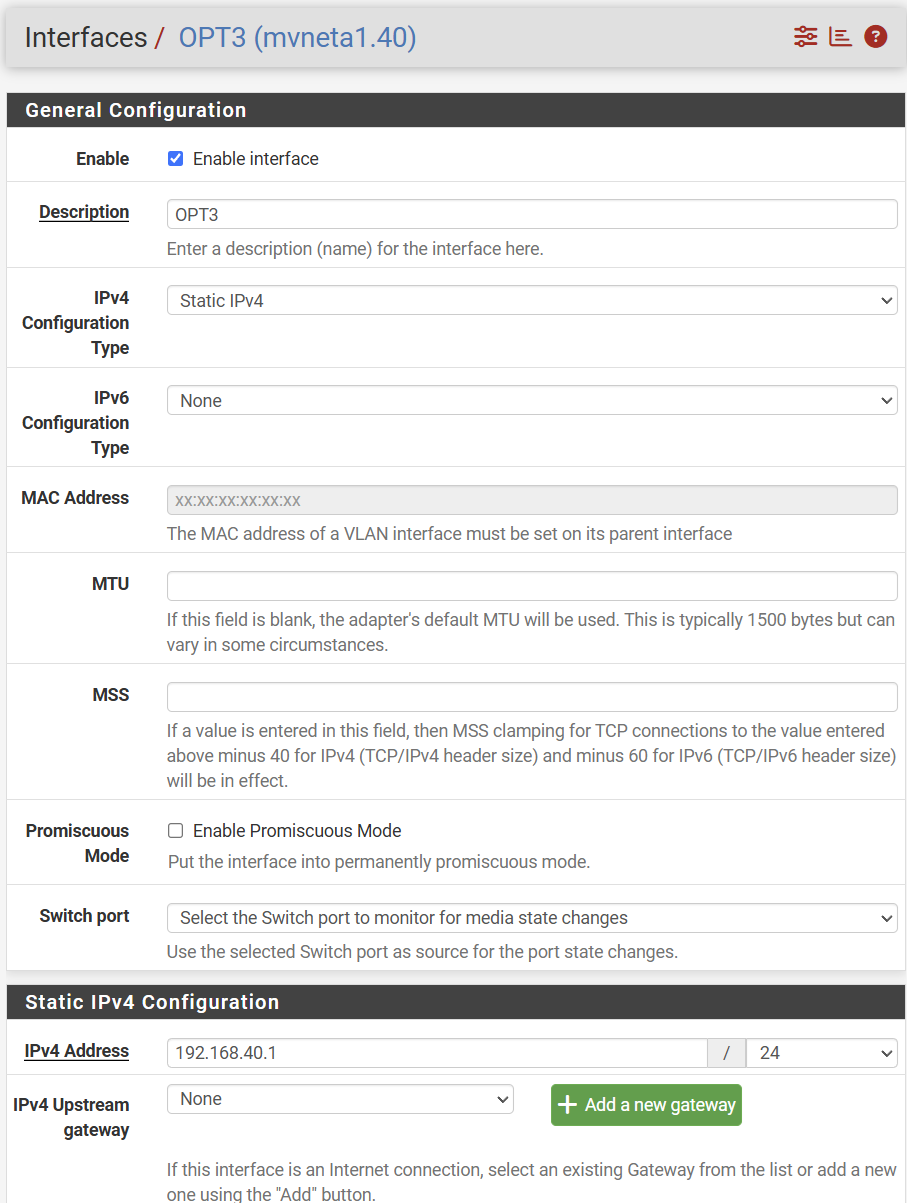
Save. - Go to the settings of the new interface (e.g., OPT1, OPT2), enable it, and configure it.
- Ensure the
Static IPv4 Configurationis selected, and assign an IP address that falls within the VLAN's subnet (e.g. 192.168.40.1/24 for VLAN 40).

Configure Firewall Rules
This step is required in the sense that you would need at least one rule: an allow
any<->any
rule.
However, in our use case for malware analysis, we want to ensure that network traffic from
this VLAN cannot communicate with any other network. So we will be adding the following rules:
- Go to
FirewallRulesand select the interface corresponding to your new VLAN. - Add a new BLOCK rule from your OPT* net to
invert matchLAN net.
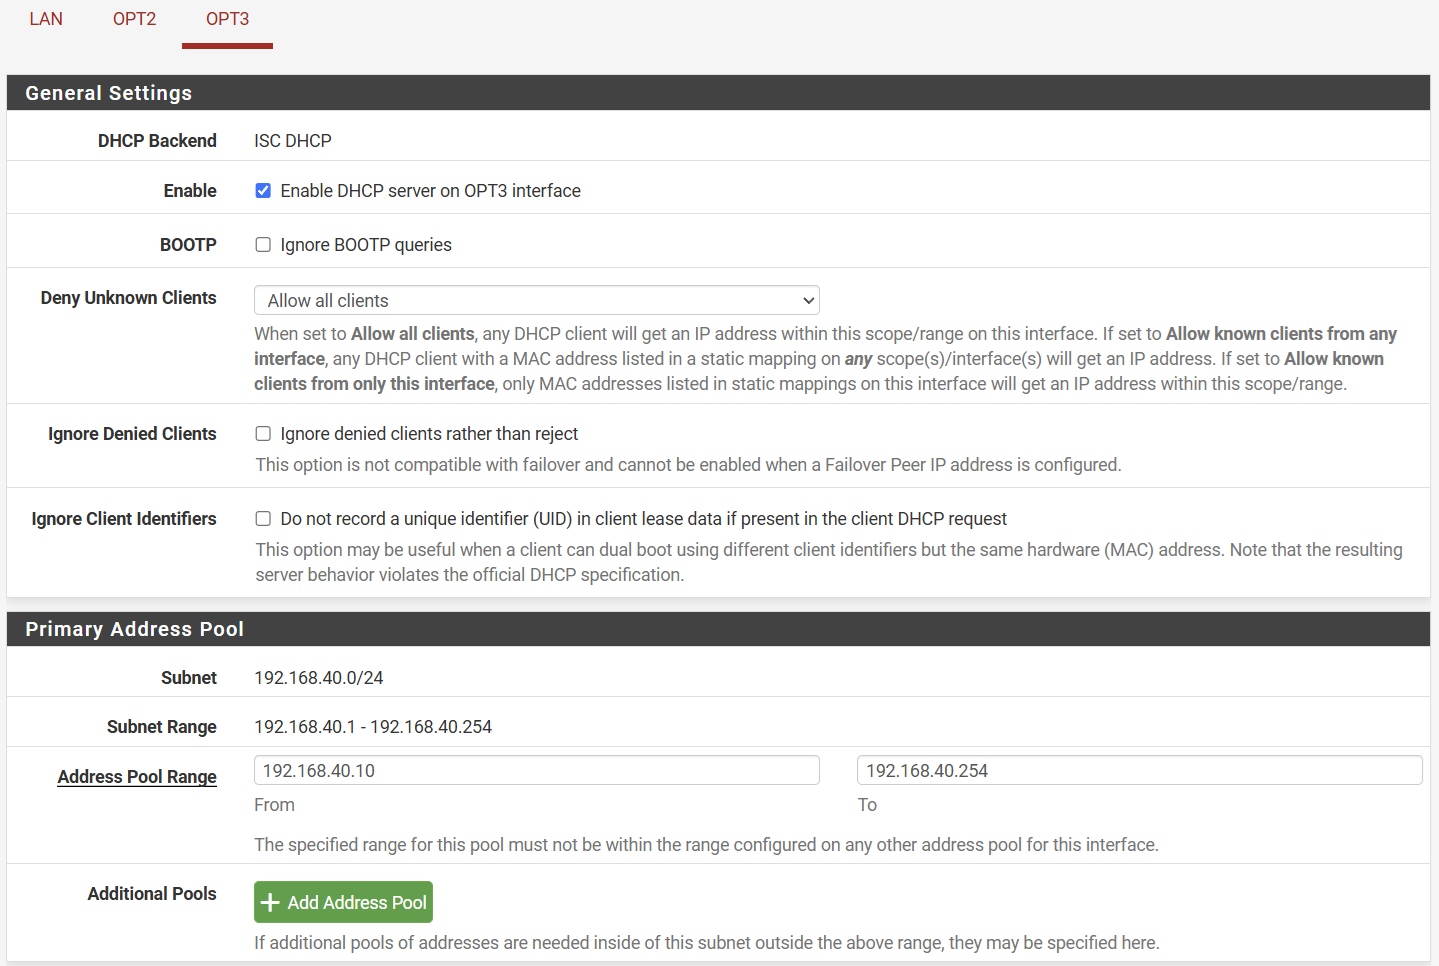
Configure the DHCP Server
We want to ensure that devices connecting to the assigned VLAN are also obtaining a valid IP
address in the VLAN-defined IP address range. In our example, this is 192.168.40.1/24.
- Go to
Services->DHCP Serverand select the interface corresponding to your new VLAN. - Enable the DHCP server and set a range of IP addresses to hand out (e.g.
192.168.40.100-192.168.40.254).
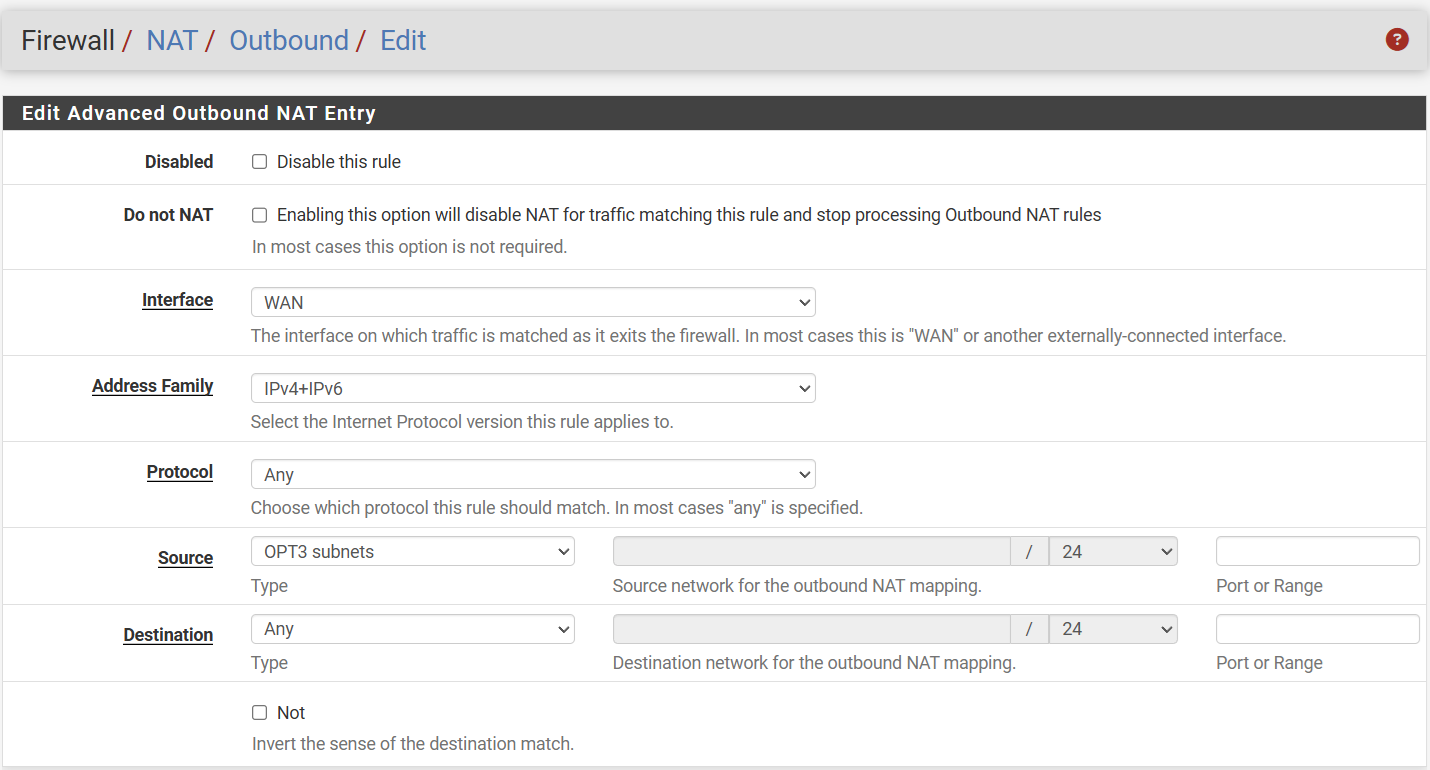
Configure Outbound NAT
The steps below only need to be completed when your Outbound NAT configuration is set to "Hybrid". In this case, you need to add a new mapping for the VLAN subnet:
- Go to
Firewall->NAT->Outboundand add a new mapping with the source being the VLAN's subnet (e.g.192.168.30.1/24).
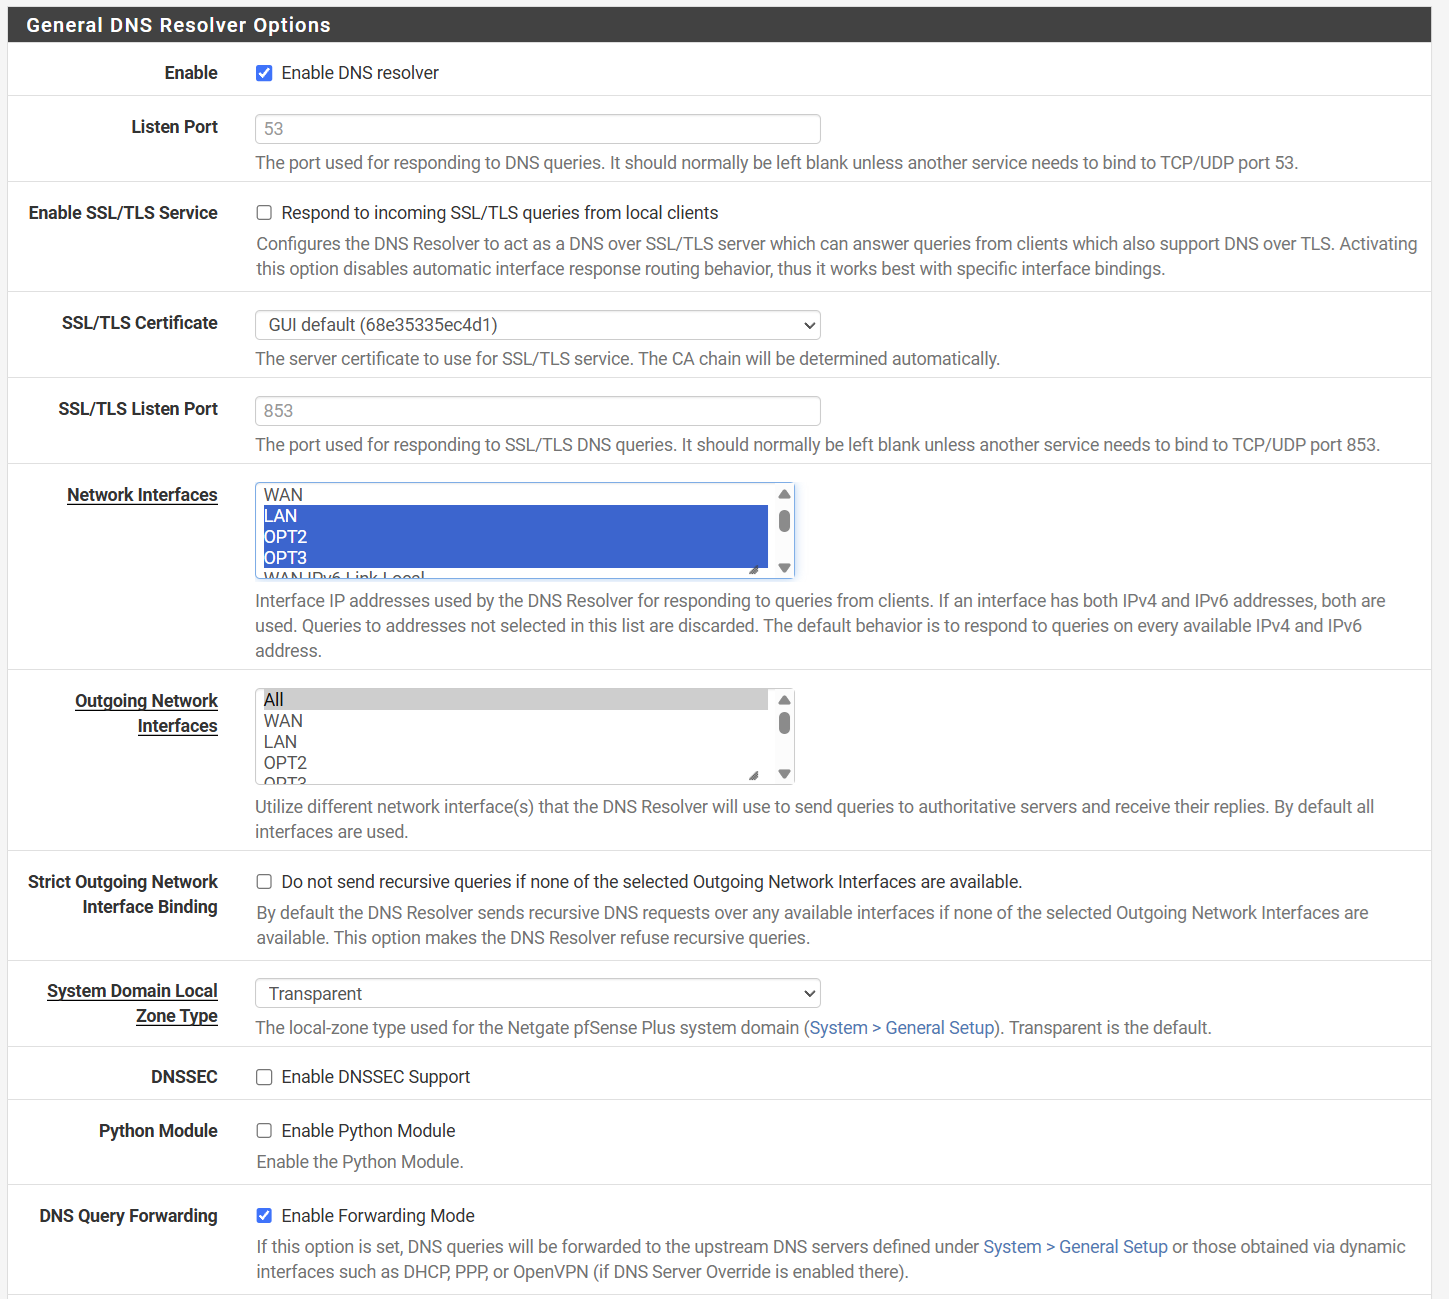
Configure DNS Resolver
This step only needs to be completed if you have an ISP Modem connected to the WAN interface of
pfSense. In that case, it is likely that your devices will obtain a valid IP address and they can ping
other (external) IP addresses but resolving hostnames fails (e.g. nslookup). If this is the
case, you will need to enable DNS Query Forwarding:
- Go to
Services->DNS Resolver->DNS Query Forwardingand enable the checkbox.
Configuring Proxmox
Finally, we arrive at the Proxmox host. Here, we need to update the network configuration which
can be found at /etc/network/interfaces. On the main network interface, we need
to make it VLAN-aware, and we need to add another network interface specific to the VLAN.
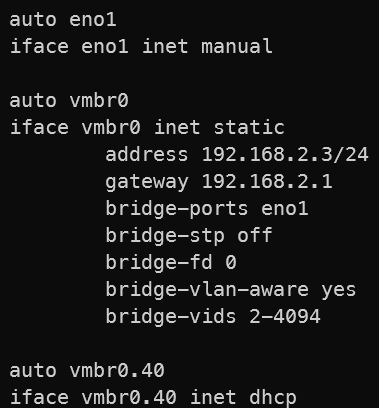
After making this change, you will need to either restart the Proxmox host or restart the
network interface using the command systemctl restart networking.
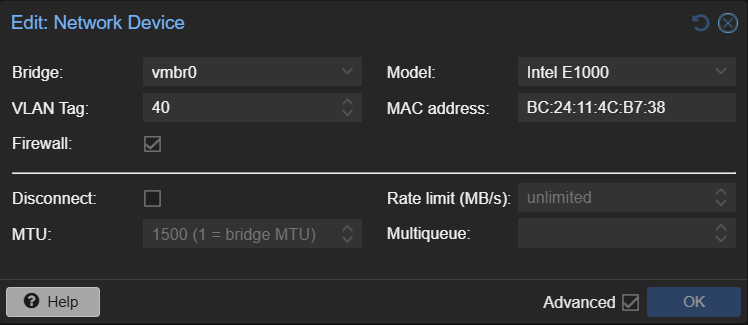
Now, specific to the Virtual Machine we are targeting, we need to set the VLAN Tag to be used.